How to Merge and Print Barcodes (Multiple barcodes on one page with adjustable size settings)
Route: Batch Barcode Generator - [ How to Merge and Print Barcodes (Multiple barcodes on one page with adjustable size settings) ]If you need more flexible and precise page layout for merged barcode printing, you can use the Export Barcodes function: [Merge and Print Barcodes (Multiple barcodes on one page with adjustable size settings)].
The core of this function is setting the print page size and cell size—the program will automatically arrange the page layout according to your specified dimensions.
Access the Print Settings Page
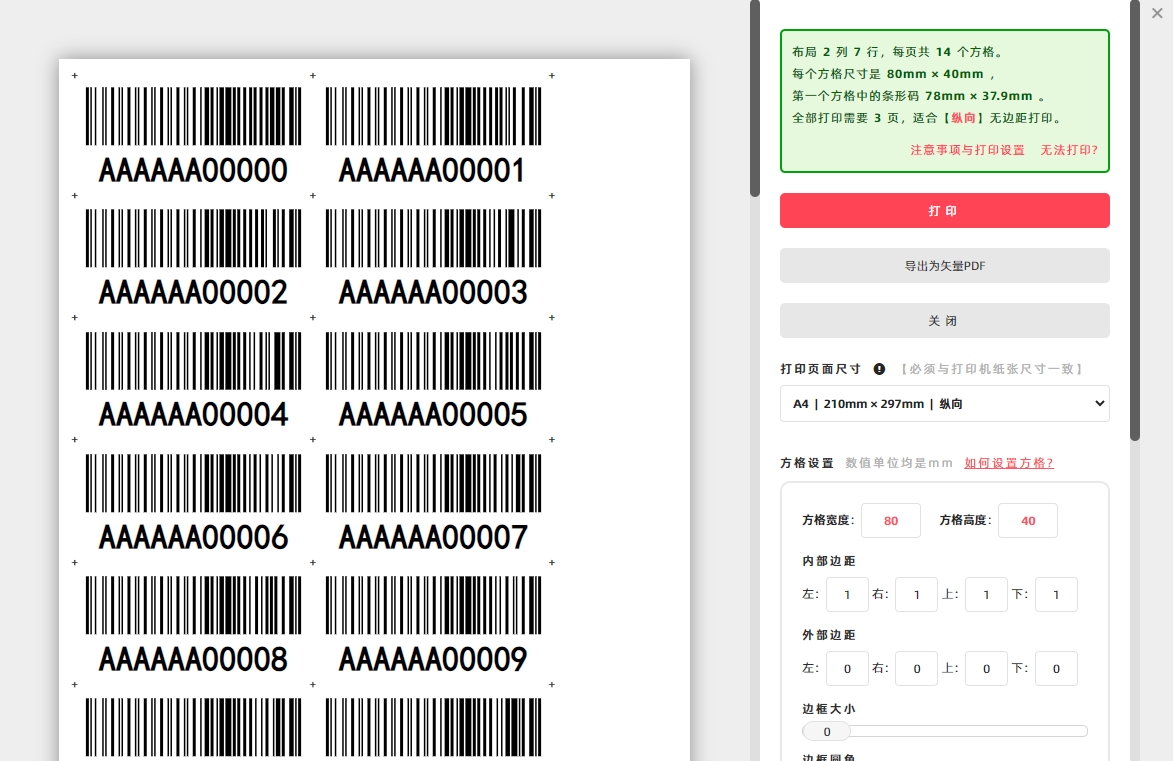
In the [Export Barcodes] module: Locate the section [Merge and Print Barcodes (Multiple barcodes on one page with adjustable size settings)], then click the [Print] button. A barcode print settings page will pop up.
Set the Print Page Size
- Click [Print Page Size]—a drop-down menu for size selection will appear.
- Choose from common paper sizes (e.g., A4, A3), or select [Custom Size] to enter your desired page dimensions manually.
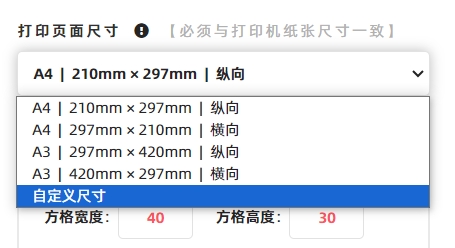
Important Note: The program will arrange the print layout based on the [Print Page Size] you specify. This size must match the actual paper size loaded in your printer. Mismatched sizes will cause layout disorders and printing errors.
Set the Cell Size
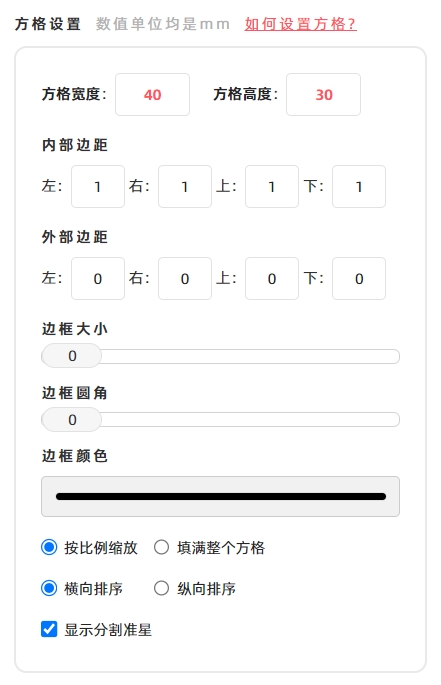
You can configure the following cell parameters (see the diagram below for detailed explanations):
- Cell width and height
- Inner margins (margins inside the cell, around the barcode)
- Outer margins (margins between adjacent cells)
- Border (of the cell)
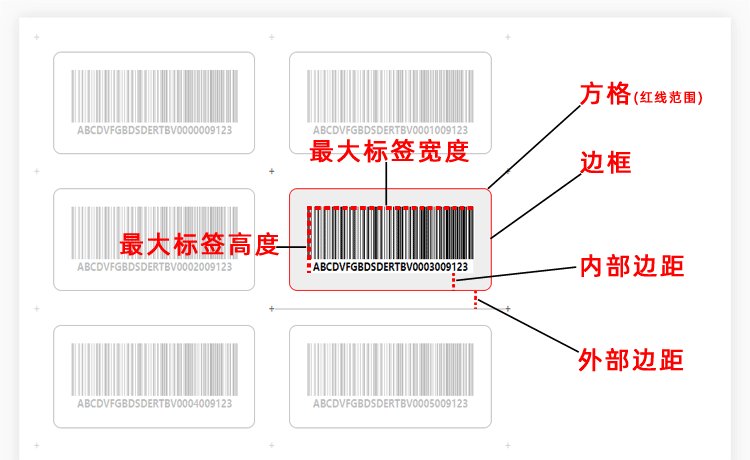
Note: The cell size you set does not include the external margins—external margins are calculated separately as spacing between cells.
Configure Barcode Scaling & Sorting
Barcode Scaling Mode
- Check [Fill Completely]: The barcode will be scaled to the maximum possible size that fills the entire cell (may affect aspect ratio).
- Check [Maintain Aspect Ratio]: The barcode will be scaled while maintaining its original aspect ratio, so its actual size will be smaller than the maximum cell size (avoids distortion).
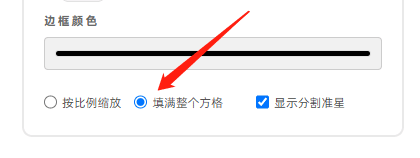
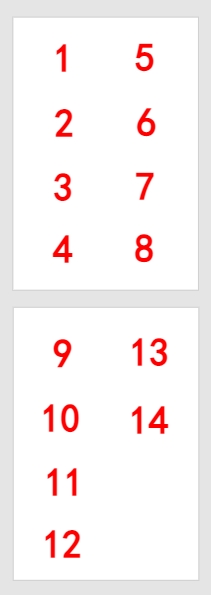
Barcode Sorting Direction
- By default (Horizontal Sort): Barcodes are arranged in horizontal order (left to right, top to bottom).
- To use vertical order: Check [Vertical Sort] (barcodes are arranged top to bottom, left to right). See the diagram below for the vertical sorting direction.
Enable Cutting Guides (Optional)
Check [Show the "+" markers]: A "+" symbol will be added at the four corners of each cell (and thus each barcode). These crosshairs serve as guides to help with post-printing cutting (for separating individual barcodes neatly).
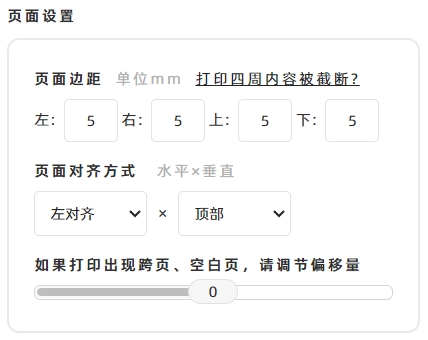
Additional Page Margin Settings
"Page Margins" refer to the margins around the entire print page (not just cells). We recommend leaving a small amount of blank space around the page edges—this prevents the printer from truncating content (e.g., barcode edges or text) during printing.
How to Export as a Vector PDF Document (If Needed)
If you need to export the merged barcodes as a vector PDF document:
- Click the [Print] button (as mentioned above).
- In the system’s print confirmation window, go to the [Target Printer] option.
- Select [Save as PDF] from the printer list.
- Follow the prompts to complete the export of the vector PDF document.
- Kindly refrain from reposting this article unless you have obtained permission.
- This is a translated article. Should you find any translation mistakes or content errors, please refer to the Original Article (Chinese), which takes precedence.
- Due to ongoing version iterations, the feature details and interface screenshots included in this article may not be updated in a timely manner, leading to potential discrepancies between the article content and the actual product. For the most accurate information, please refer to the features of the latest version.